
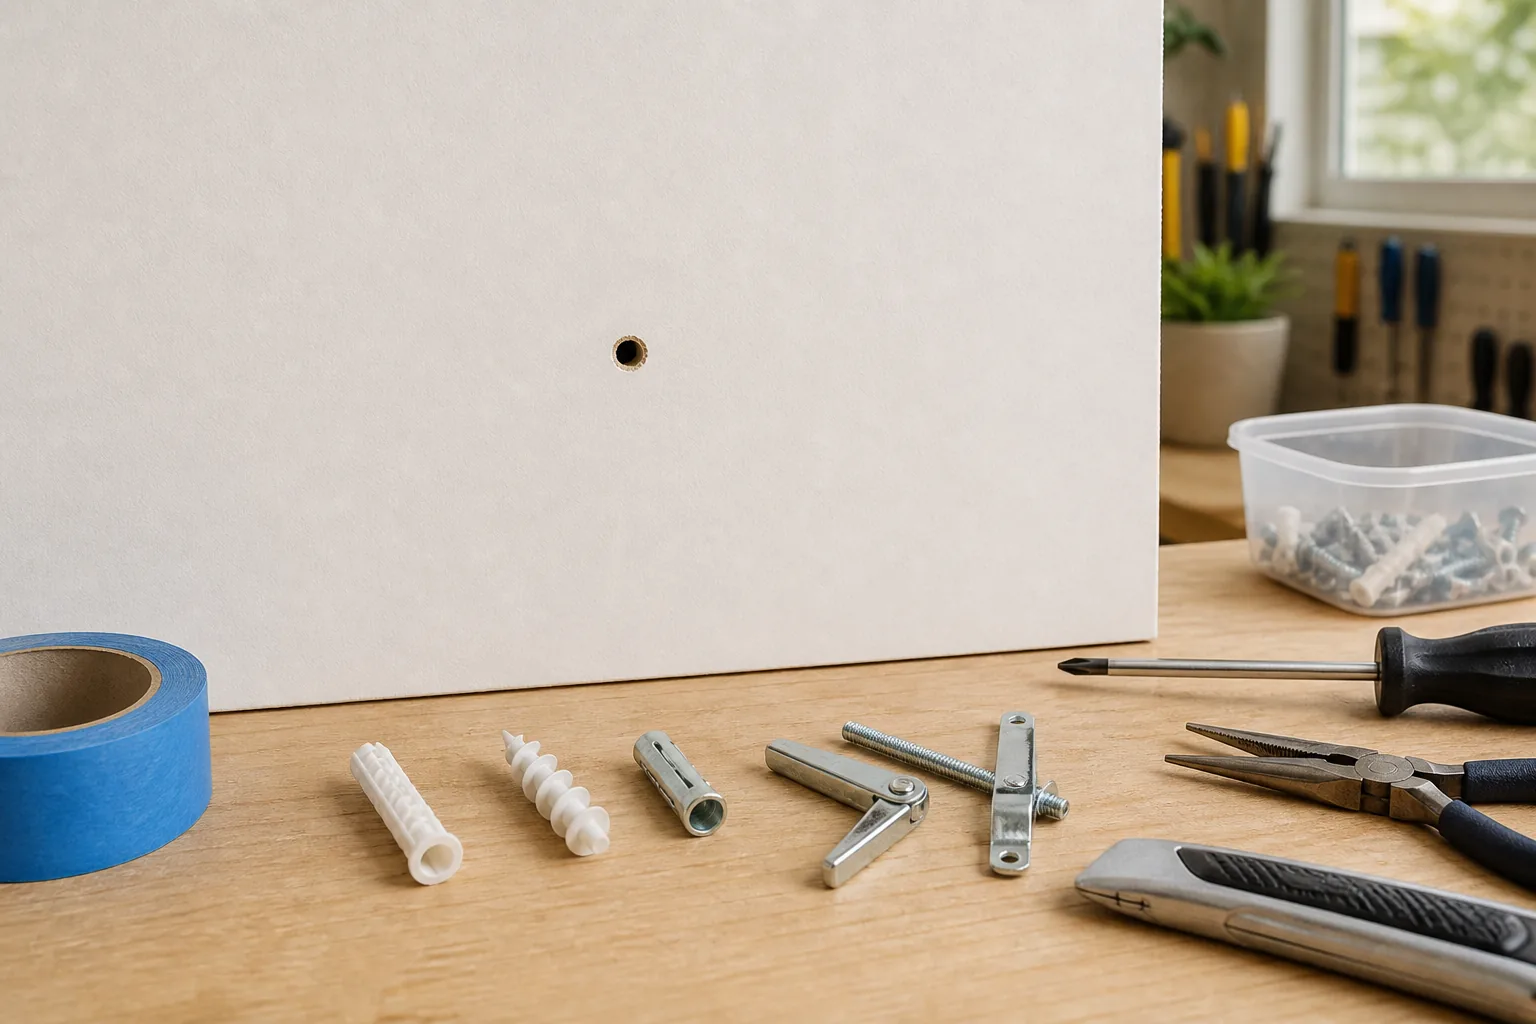
Direct answer: identify first, then use the exact maker's method
The least damaging approach is the one documented for the anchor that is actually in the wall. Some anchors are designed to back out. Others have a flange or retaining part that the maker directs you to separate before the hidden body is recessed into the cavity. A traditional spring toggle and an expanded metal sleeve use different hidden mechanisms again, so appearance alone does not make those methods interchangeable.
Remove the load and fixture, retain the screw and any packaging, and inspect the anchor without pulling on it. If you cannot match the visible parts and behavior to current manufacturer instructions, do not turn a product-specific example into a generic experiment. A planned drywall repair is safer for the wall than repeated twisting, drilling or prying with no verified procedure.
- Unload and remove the fixture before diagnosing the anchor
- Record the anchor head, screw and wall condition
- Find instructions for the exact brand, model and generation
- Use only the removal path stated for that product
- Inspect the drywall after every controlled step
Use this identification and removal decision table
The examples below show why a product name matters. They summarize only what the cited manufacturers document; they are not instructions for a look-alike anchor from another maker.
Match the installed anchor using packaging, order history, markings and current manufacturer drawings. If the maker has no removal procedure for that exact item, treat the method as unknown rather than borrowing one from a similar-looking fastener.
| What you can verify | What a primary source supports | Safe boundary |
|---|---|---|
| Exact TOGGLER SnapSkru self-drilling anchor | TOGGLER directs removal of the screw, then counterclockwise rotation of that anchor with a No. 2 Phillips screwdriver so its legs collapse. | This belongs to the named SnapSkru design. Do not assume every threaded plastic or metal anchor collapses the same way. |
| Exact TOGGLER plastic toggle or ALLIGATOR anchor | TOGGLER directs removal of the screw, cutting through the plastic neck below the flange with a thin sharp blade, and slight recession of the flangeless body. | The cutting method applies only to the named products and listed wall conditions. Keep the blade on the exposed plastic, not an unidentified metal sleeve. |
| Exact TOGGLER SNAPTOGGLE | The current TOGGLER FAQ permits the same flange-removal and recession process, while warning that its larger opening may need bridging before patching. | Confirm the exact product. Do not transfer this procedure to a traditional spring-wing toggle. |
| Verified traditional spring toggle | Rawlplug's installation guide shows compressed wings passing through the board and opening behind its rear face. | That source explains the concealed mechanism, not a universal removal procedure. Support the fixture and consult the exact maker before fully releasing the screw. |
| Unidentified molly, hollow-wall sleeve or look-alike anchor | The cited product instructions do not establish one removal procedure for every metal sleeve or anchor family. | Stop and identify the model or plan a qualified drywall repair. Do not drill, crush or pry it merely because another brand's method looks plausible. |
Prepare the wall and work area
Take the object down or support it independently so the anchor carries no load. Photograph the fastener arrangement before removal, then keep the screw and any loose parts together. Bright side lighting can reveal the flange, lifted paint and the edge of the face paper without scraping the surface.
Protect the floor from dropped metal and plastic pieces and keep hands out of any cutting path. If an exact manufacturer method specifies a thin blade, use it only where the cut can be controlled against the named plastic part. Do not introduce a drill, rotary tool or impact merely because hand pressure did not work; that changes the dust, heat and wall-damage risk.
- Clear people and fragile items from the drop zone
- Support the mounted item before loosening hardware
- Save the original screw for identification
- Use side light to inspect the flange and paper edge
- Plan the post-removal repair before starting
Follow a verified product path one step at a time
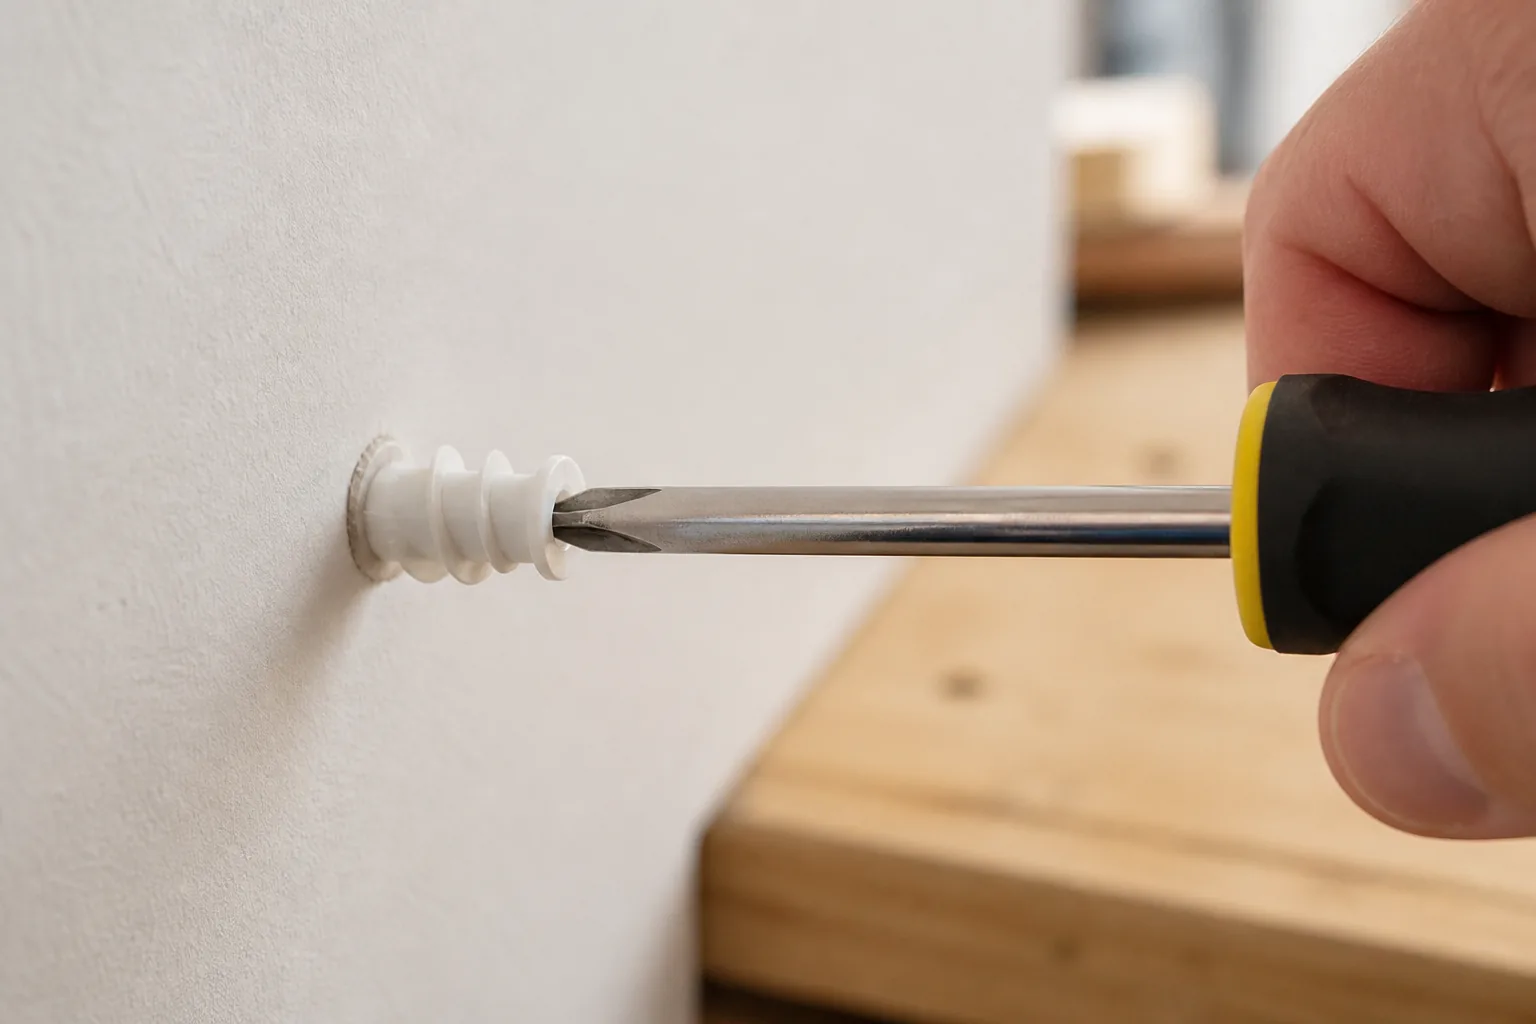
For a verified SnapSkru, TOGGLER's current FAQ specifies a No. 2 Phillips screwdriver and counterclockwise rotation after the screw is out. The documented collapsing-leg behavior is a feature of that product. If the anchor does not respond as described, stop; the product, installation or surrounding wall may be different.
For a verified TOGGLER plastic toggle or ALLIGATOR, the published method intentionally leaves the hidden body behind after its plastic neck is separated. TOGGLER describes a related process for its SNAPTOGGLE and notes that the remaining opening may require bridging before patching. In each case, keep the operation limited to the part the maker names and inspect the drywall paper before continuing.
- Complete one documented action, then inspect
- Keep levering forces off the face paper
- Do not enlarge the opening to make a method work
- Do not mix instructions from different anchor designs
- Stop when the visible parts no longer match the manual
Treat spring toggles and unknown metal sleeves differently
Rawlplug's SPO installation information shows why a spring toggle cannot be treated like a self-drilling anchor: folded wings pass through the opening and then bear against the back of the board. Removing the visible screw changes that concealed connection. Before loosening it completely, support the fixture and verify what the exact maker says will happen to the wing and other concealed parts.
A metal hollow-wall or molly-style sleeve may remain expanded against the back of the panel. None of the product-specific TOGGLER methods above establishes a universal way to collapse, drill or pull every such sleeve. If the model cannot be identified, choose qualified removal or a planned drywall repair instead of improvising with pliers, a larger bit or hammer blows.
- Hidden wings and expanded sleeves are different mechanisms
- A screw coming out does not mean the anchor body can follow through the same hole
- Do not use a self-drilling-anchor method on an expanded metal sleeve
- Plan for concealed loose parts before releasing them
- Escalate when the wall or anchor cannot be identified
Stop before a small opening becomes a crater
Pause immediately if paint or face paper lifts with the flange, gypsum begins to powder, the anchor spins without following its documented sequence or a cutting tool cannot stay on the named plastic part. Also stop when several old holes overlap, the wall feels soft, moisture staining is present or the fastener crosses tile, plaster or another layer that was not part of the plan.
More force does not confirm that an anchor is removable. It may only transfer force into the paper and gypsum surrounding the opening. Support the work, photograph the new condition and decide whether the next step is better product identification, controlled recession of a permitted part or a larger documented repair.
- Paper tears or paint delaminates
- Gypsum sheds powder or flexes locally
- The anchor response differs from the instructions
- A blade or screwdriver wanders onto the wall finish
- Moisture, cracking or an unexpected wall layer appears
Use lead-safe planning for older painted walls
The EPA warns that renovation and repair activities such as scraping, drilling, cutting and opening walls can create dust from lead-based paint in pre-1978 homes. Before an anchor-removal plan disturbs an older painted surface, determine whether lead may be present and review the EPA's current DIY lead-safe guidance.
EPA recommends hiring a lead-safe certified contractor for renovation work in pre-1978 homes. Its homeowner guidance addresses work-area containment, occupant protection, dust minimization, cleanup and waste control when a homeowner proceeds. A small anchor does not make the coating around it irrelevant.
- Confirm the building and painted-surface history
- Keep children and other occupants away from the work area
- Avoid unnecessary cutting, drilling and sanding
- Contain and clean debris using EPA guidance
- Use a lead-safe certified professional when appropriate
Classify the opening before choosing a repair
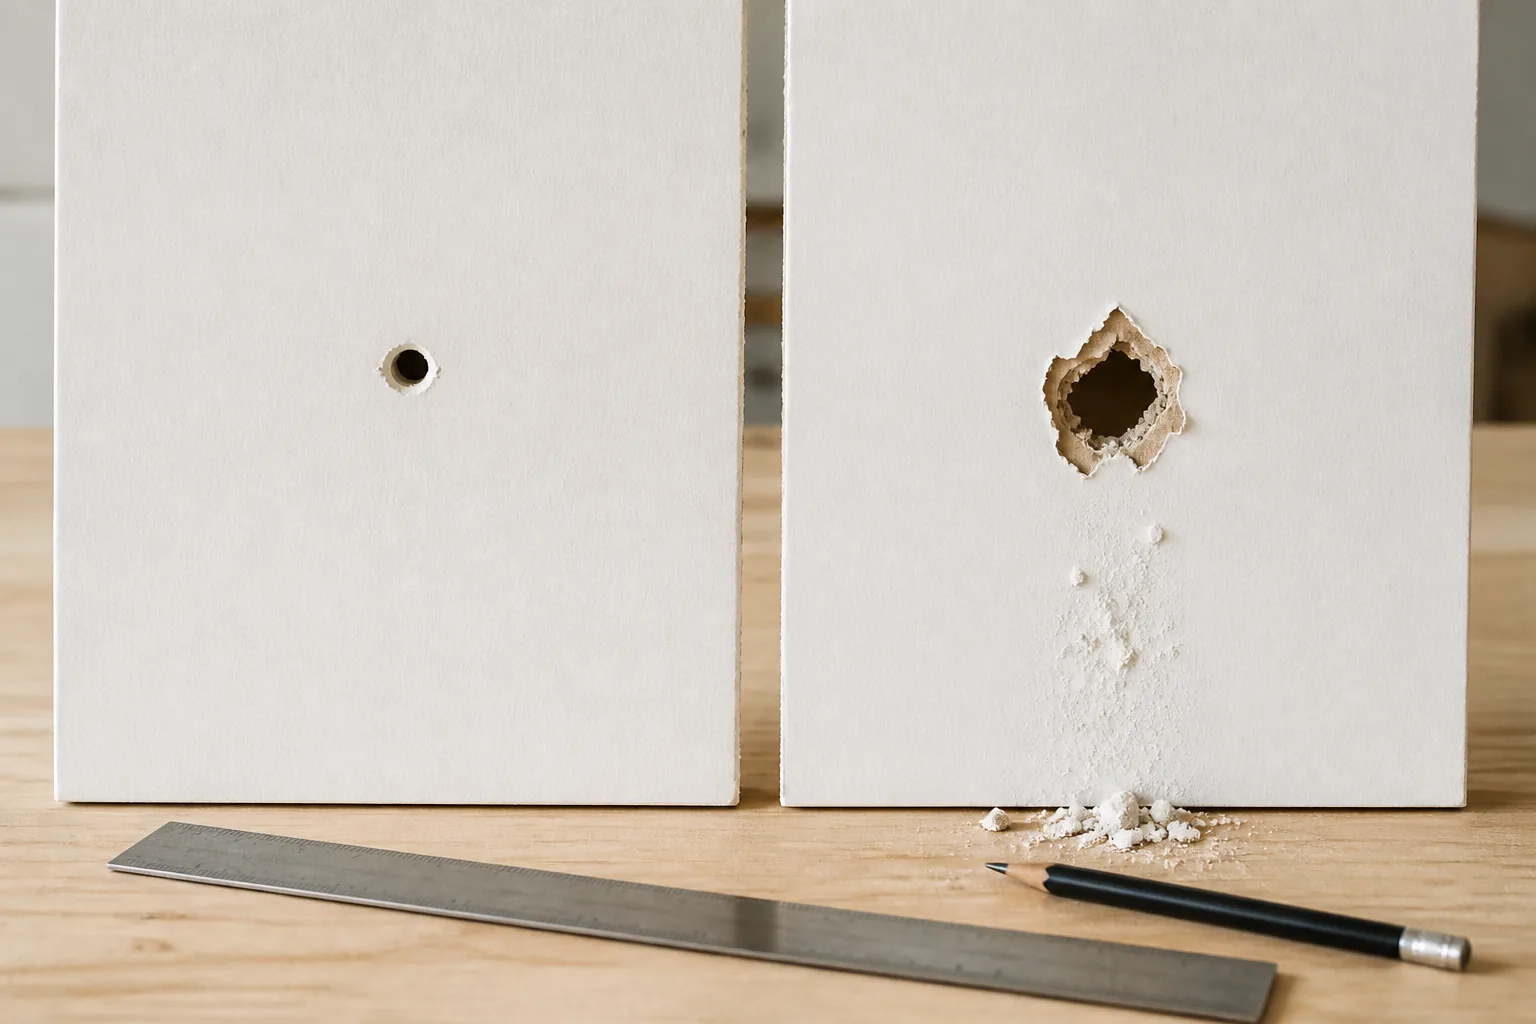
After the anchor is removed or recessed, inspect the opening in side light. A small original hole with intact bonded paper is different from lifted brown paper, crushed gypsum or a large unsupported opening. Measure the full damaged area rather than the original screw diameter, and confirm that the surrounding board is dry and firm.
USG offers repair panels in 1/2-inch and 5/8-inch thicknesses with a published installation guide for damaged drywall. That does not mean every anchor opening needs a panel; it establishes a documented repair route when the damage is too large for a minor finish repair. Follow the selected repair system and keep the cosmetic patch separate from any future mounting decision.
| Observed condition | Next decision | Guide to use next |
|---|---|---|
| Original-size opening; paper remains bonded | Use a repair product documented for that opening and finish system. | How to Patch Small Holes in Drywall |
| Torn face paper or shallow crater | Stabilize the damaged paper and size the repair from the full affected area. | How to Fix an Oversized Anchor Hole |
| Large, soft, wet, cracked or overlapping damage | Stop routine patching and evaluate panel repair, moisture correction or qualified help. | How to Fix an Oversized Anchor Hole |
Plan any remount as a new attachment
A smooth patch is not evidence that the old location can carry another anchor. If the object will return, reassess its complete installed weight, movement, bracket geometry and wall construction. Use sound material, verified framing or a manufacturer-approved fastening system at a location that preserves required spacing.
Do not reinstall the removed anchor or reuse its hole unless the exact manufacturer explicitly permits that reuse and the wall still meets every stated condition. A repair restores the finish only to the extent documented by its system; it does not automatically restore an anchor rating.
- Recheck the complete object and hardware weight
- Identify sound drywall or verified framing
- Respect bracket-hole and anchor-spacing requirements
- Use new hardware unless reuse is explicitly permitted
- Keep a cosmetic patch out of the new load path unless a documented system allows it
Frequently asked questions
Can every plastic drywall anchor be pulled out with pliers?
No. Pulling can tear the face paper, and some products are designed to back out or have their plastic neck separated instead. Identify the exact anchor and use its maker's current removal instructions.
Can every self-drilling anchor be unscrewed from drywall?
No. TOGGLER publishes a counterclockwise removal method for its SnapSkru design, but that product-specific behavior should not be transferred to another self-drilling anchor without its manufacturer's instructions.
What happens to a spring toggle when the screw is removed?
It depends on the exact design. Rawlplug documents wings that open behind the board, which explains why the concealed part must be considered before the screw is fully released. Consult the exact product's removal guidance.
Can I reuse a drywall anchor after removing it?
Do not assume so. Reuse is acceptable only when the exact manufacturer permits it and both the anchor and wall still meet every stated condition.
Can I patch the hole and install another anchor in the same place?
A cosmetic patch should not be assumed to restore anchor capacity. Use sound material or a specifically documented repair-and-fastening system.
Does removing one anchor matter in a pre-1978 home?
It can disturb painted material. The EPA advises determining whether lead may be present and using lead-safe practices for renovation and repair work that creates dust or chips.
A practical next step
Before buying hardware, confirm the wall assembly and read the installation instructions for both the object and the exact fastener. If you need a starting category, use our Anchor Selector.
Sources and further reading
These primary and manufacturer resources support the safety and installation principles summarized above. Always use the current instructions for your exact product.
- Frequently Asked Questions: Removing TOGGLER Anchors — TOGGLER
- SPO Spring Toggle Installation Guide — Rawlplug
- Sheetrock Patch & Repair Panels — USG
- Lead-Safe Renovations for DIYers — U.S. Environmental Protection Agency