
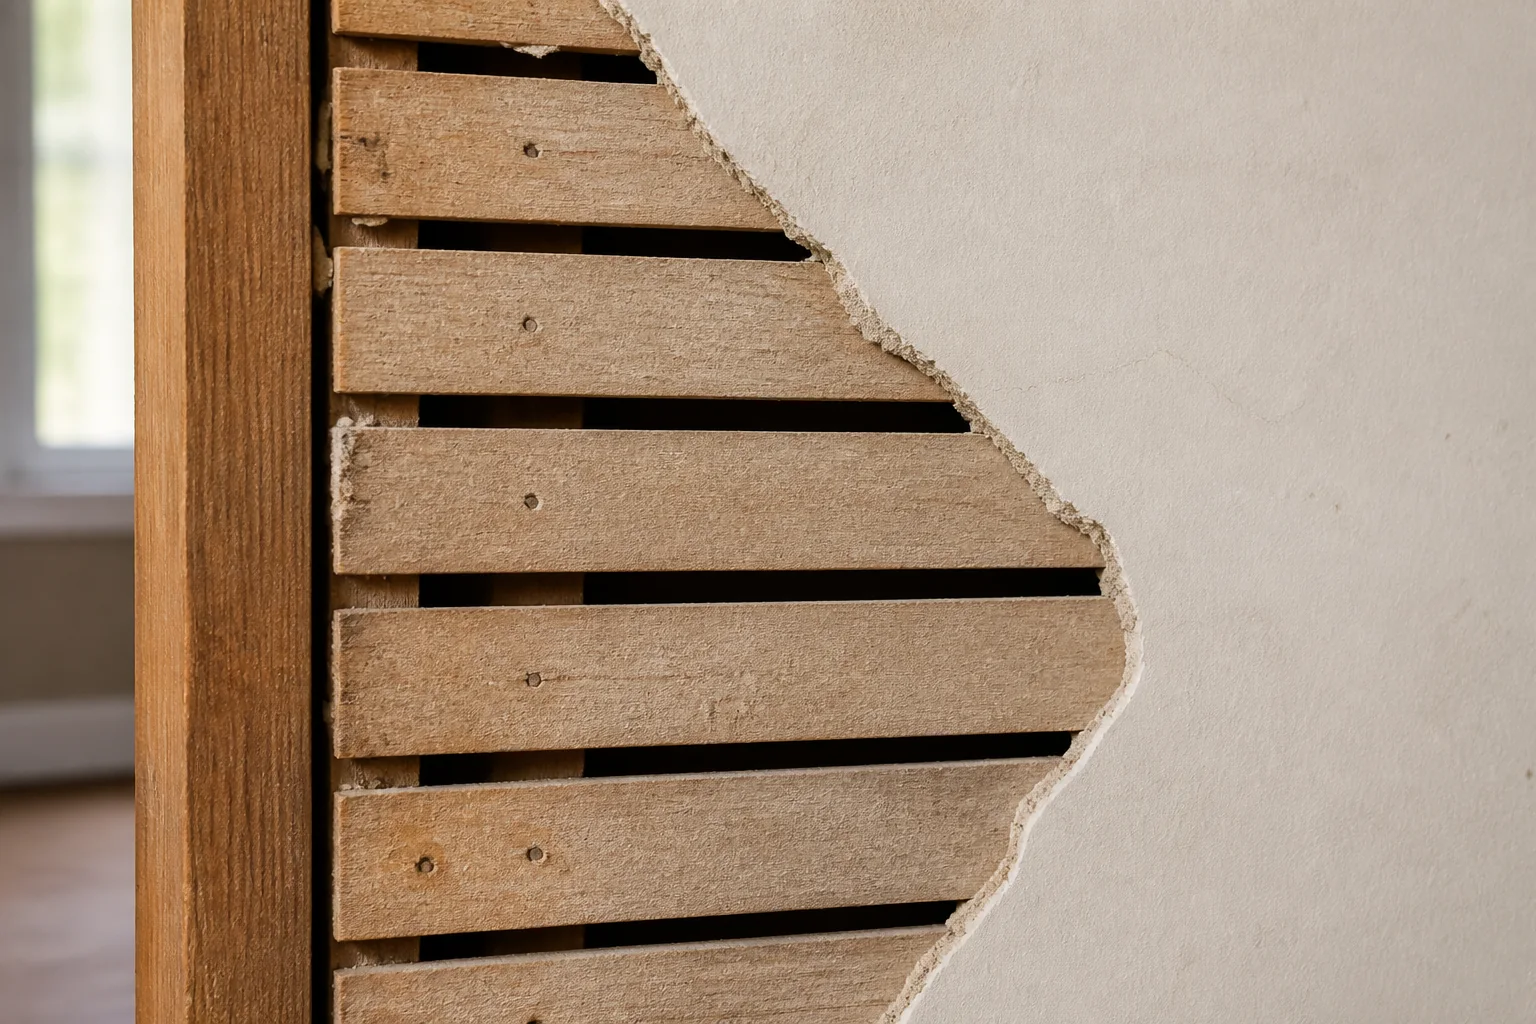
Plaster describes more than one wall
Traditional plaster may be applied over wood lath, expanded metal lath or gypsum lath. Veneer plaster can also cover a gypsum base. These systems differ in thickness, hardness, fastener behavior and what an electronic stud finder sees.
Wood-lath plaster develops keys behind the strips. Repeated impact or flexing can break those keys and loosen an area larger than the hole. Metal lath creates strong signals and can make casual magnetic or electronic detection difficult.
- Wood-lath plaster
- Metal-lath plaster
- Gypsum-lath plaster
- Veneer plaster over gypsum base
- Later drywall repairs within an older wall
Build identification from several clues
Review the home’s construction and remodeling history, then inspect an already exposed edge in an unfinished area or legitimate access opening. Plaster is often harder, thicker and more variable than drywall, and fine age-related cracks may be present. None of those observations proves the lath type by itself.
At a safe existing cover-plate edge, the wall thickness may be visible after power is turned off, but do not insert tools, disturb wiring or use the electrical box as an inspection portal. A remodeled room may combine plaster and drywall, so verify the actual mounting zone.
- Construction era and remodel records
- Existing exposed edge
- Surface hardness and thickness
- Crack and repair patterns
- Multiple framing-location methods
Check for older-home hazards
Homes built before 1978 may contain lead-based paint beneath newer coatings. The U.S. Environmental Protection Agency warns that drilling, sanding and cutting painted surfaces can create hazardous dust and recommends lead-safe practices; it recommends hiring a lead-safe certified contractor for renovation work in pre-1978 homes.
Older walls can also conceal legacy wiring, pipes and undocumented changes. Plan from both sides of the wall, limit drill depth and stop at unexpected metal, voids or resistance. Suspected hazardous material or fragile wiring is a reason to obtain professional help.
- Assess lead-paint risk
- Contain and clean dust appropriately
- Review electrical and plumbing clues
- Keep occupants away from the work zone
Locate framing without damaging plaster
Use converging evidence: visible trim fasteners, strong magnetic hits aligned vertically, measurements from a confirmed framing member and safe observation in an unfinished area. Knocking is subjective, and many stud finders react to lath, old fasteners or dense repair material.
Mark both edges of a probable stud and confirm the center at several heights. Do not create a row of exploratory holes. If the installation is heavy or consequential and the signals disagree, a qualified installer can use more appropriate inspection methods.
- Look for repeated vertical evidence
- Distinguish lath signals from framing
- Confirm every required attachment point
- Avoid exploratory damage
Choose and install compatible hardware
The mounted object’s instructions take priority. Use framing, blocking or an engineered attachment when required. Account for the entire plaster-and-lath thickness when calculating fastener length and wood embedment.
For any cavity fastener, confirm that its manufacturer explicitly permits the identified plaster/lath assembly and thickness. Drill the finish with a method appropriate to brittle plaster, support the surface where directed and avoid hammering. Tighten evenly without crushing or separating the finish.
- Match the exact wall assembly
- Choose the correct bit for each layer
- Protect brittle edges
- Use sufficient structural embedment
- Stop if cracks grow or the surface moves
Repair cracks and holes as plaster—not drywall by default
Stable small defects and moving cracks require different repair strategies. USG’s plaster repair guidance describes reinforcing cracks and using compatible setting compounds and bonders for appropriate systems. A crack that returns may indicate movement that a surface skim cannot solve.
Keep cosmetic repair separate from remounting. New fasteners belong in verified sound material or structural backing, not simply in a hard patch. Extensive bulging, loose keys, water damage or widespread cracks warrant plaster evaluation before mounting.
Frequently asked questions
Does a hard wall mean it is plaster?
Not conclusively. Veneer plaster, dense board and masonry finishes can also feel hard; inspect several clues.
Can drywall anchors be used in plaster?
Only if the exact anchor explicitly lists the identified plaster/lath assembly and thickness.
Why does plaster crack when drilled?
Brittle finish, vibration, dull or incorrect bits, weak keys and previous damage can all contribute. Stop if cracking spreads.